
Your Instagram Story usually looks blurry for one of four reasons: the file isn't 1080 x 1920 pixels, Instagram compressed it harder because of a weak connection or a data-saving setting, the image was already compressed before you uploaded it, or you zoomed in on it inside the Story editor.
The fastest fix: open your Instagram settings, go to Media quality, turn on Upload at highest quality, turn off Use less cellular data, and then re-upload the original 1080 x 1920 file over Wi-Fi.
If that doesn't solve it, work through the checks below. They start with the most common causes and move on to the less obvious ones, like HDR video, ProRAW photos and files that get compressed twice.
Why your Story looks fine on your phone but blurry on Instagram
You took a sharp photo. It looks great in your camera roll. Then you post it to your Story and it turns soft, smeary or blocky. That gap happens because the file you see in your gallery is not the file your followers see. Instagram makes its own copy, and that copy is smaller.
What's usually going wrong
- Wrong size or shape. A photo that isn't 9:16 gets scaled or cropped to fit the screen.
- Weak connection. Uploading on patchy mobile data can push the app to send a lighter file.
- Data-saving settings. Instagram's media quality options can trade sharpness for lower data use.
- Double compression. The image was already squeezed by WhatsApp, a screenshot or another app.
- Zooming in the editor. Pinching to enlarge a photo in the Story editor stretches its pixels.
Why the basic advice doesn't always work
Most guides stop at "use Wi-Fi." That helps, but it won't fix a file that was low quality before it left your phone. You need to check the source file, the app settings and the connection together. Fixing one while ignoring the others often leaves you with a slightly less blurry Story, not a sharp one.
How Instagram compression works
Why sharp files still get softer
Every photo and video you post gets re-encoded so it loads quickly for millions of viewers on all kinds of connections. Re-encoding throws away detail the algorithm thinks people won't notice. Fine textures, dark shadows and small text are the first to go.
The photocopy-of-a-photocopy problem
Each time an image is compressed, it loses a bit more detail, and the losses stack. A photo saved from WhatsApp, screenshotted, edited in another app and then posted to Instagram has been compressed three or four times before Instagram adds its own pass. No setting can bring that detail back.
Why dimensions matter more than people think
Stories are designed for 1080 x 1920. A smaller file gets stretched up to fill the screen, which looks soft. A much larger file gets scaled down by Instagram, and you don't control how. Sending exactly 1080 x 1920 means Instagram has less resizing to do, so you keep more of the sharpness you started with.
Your pre-upload checklist for sharp Stories
Start with the right source file
- Use the original photo or video from your camera roll, not a screenshot or a saved copy from a chat app.
- Crop or design at 9:16 before you open Instagram.
- Shoot in good light. Low-light photos carry noise, and compression turns noise into smudges.
- If you add text, consider using Instagram's own text tool. Instagram renders that text on top of your image, while small text baked into the photo gets compressed with it.
Optimal Instagram Story upload settings
| Setting | Photo | Video |
|---|---|---|
| Dimensions | 1080 x 1920 px | 1080 x 1920 px |
| Aspect ratio | 9:16 | 9:16 |
| File format | JPEG | MP4 with H.264 video and AAC audio |
| Color | sRGB | Standard dynamic range (SDR) |
| Frame rate | Not applicable | 30 FPS (Meta accepts 23 to 60) |
| Length | Not applicable | Up to 60 seconds per Story clip |
| Size limit for scheduling tools | 8 MB (Meta's API) | 100 MB (Meta's API) |
The file size limits in the last row come from Meta's developer documentation and apply to Stories published through scheduling tools. Uploading in the app is more forgiving, but a smaller, clean file still uploads faster on a slow connection.
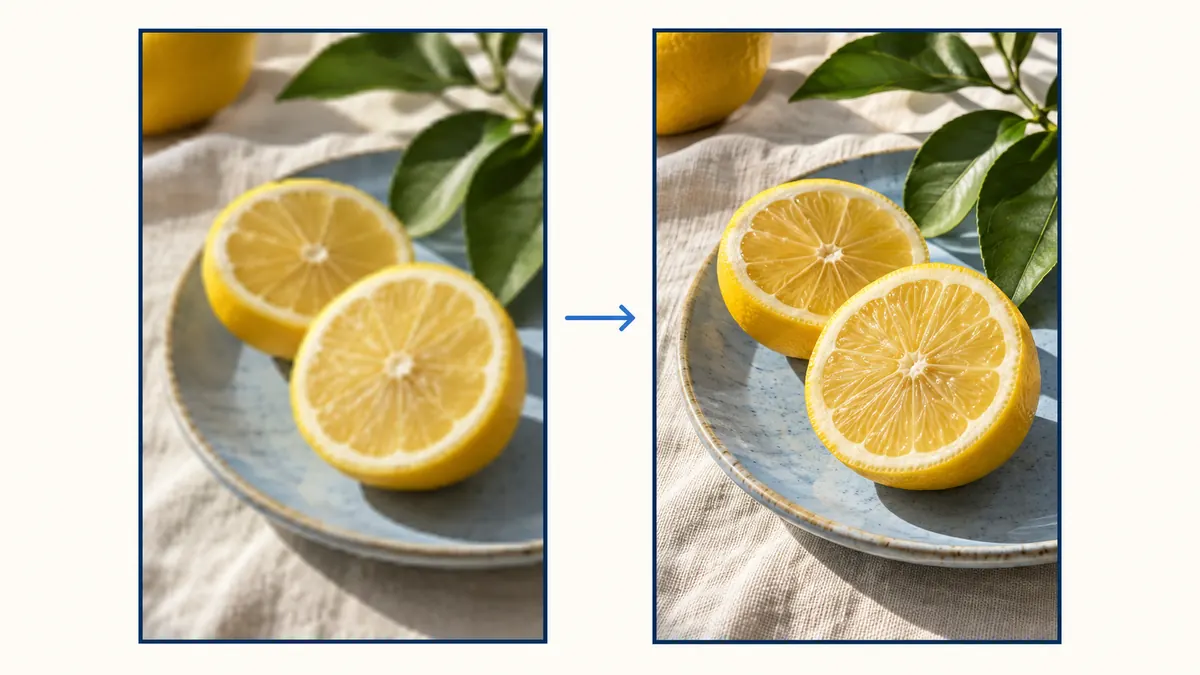
Fix your app settings and connection
Turn on highest-quality uploads
- Go to your profile and tap the menu icon in the top right.
- Under Your app and media, tap Media quality.
- Turn on Upload at highest quality.
- Turn off Use less cellular data.
Instagram's help center notes that higher-quality uploads can take longer. Menu names vary between app versions and between iPhone and Android, so if you can't find these options, type "media quality" into the search bar at the top of your settings.
Upload on a strong connection
When the connection is weak, the upload is more likely to come out soft. Switch to Wi-Fi, or wait until you have a strong signal. If your Story looks blurry right after posting, give it a minute. Instagram sometimes shows a lower-quality version first while it finishes processing.
Update the app and clear the cache
Old app versions can have upload bugs. Update Instagram from the App Store or Google Play. On Android, you can also clear Instagram's cache from your phone's settings (usually Apps, then Instagram, then Storage) if uploads keep failing or looking wrong.
A troubleshooting flow that works
- Check the file: is it 1080 x 1920 and the original, not a copy?
- Check the settings: highest quality on, less data off.
- Check the connection: Wi-Fi or strong signal.
- Delete the blurry Story and upload again.
- Still blurry? Try uploading the same file to a test account or a Close Friends Story. If it's sharp there, the problem was the earlier upload, not the file.
Advanced fixes: HDR, ProRAW and double compression
Why HDR and ProRAW can backfire
Recent iPhones record video in HDR by default and can shoot ProRAW photos. These formats hold more data than a Story needs, so Instagram has to convert them. That conversion can leave colors washed out and detail softer than you expect.
The fix for iPhone users
- HDR video: for clips you plan to post, you can turn off HDR in Settings, then Camera, then Record Video, then HDR Video. Or export an SDR version from your editing app.
- ProRAW photos: edit the RAW file, then export a JPEG at 1080 x 1920 before you upload it.
- HEIF/HEVC files: if conversions keep causing trouble, set Settings, then Camera, then Formats to Most Compatible, which saves new photos as JPEG and video as H.264.
Double compression is the bigger hidden problem
The most common hidden cause of blurry Stories is a file that was compressed before Instagram ever saw it. Messaging apps often shrink photos and videos to save data. Screenshots of photos are lower quality than the original. Saving a video from one social app and posting it to another adds another round of compression.
How to avoid double compression
- Transfer files between your own devices with AirDrop, a USB cable or a cloud drive set to keep originals.
- If a teammate sends you a photo through a chat app, ask for the original file or a shared-drive link instead.
- Export once from your editor at the final size. Don't export, re-open and export again.
Keep quality high when you schedule Stories
When a team shares Story assets through group chats, quality drops before anyone posts. A safer workflow is to keep the master files in one place and publish from there.
ViralFarm schedules Instagram Stories alongside Reels and feed posts from one queue and calendar. Upload your 1080 x 1920 export once, pick a time, and it publishes without passing through anyone's camera roll or chat history. If a photo needs resizing first, our free Instagram photo resizer gets it to Instagram's sizes.
Your final checklist for blur-free Stories
- File is 1080 x 1920 pixels, 9:16.
- File is the original, not a screenshot or chat-app copy.
- Photos are JPEG in sRGB; videos are MP4, H.264, SDR.
- Upload at highest quality is on and Use less cellular data is off.
- You're on Wi-Fi or a strong signal.
- You didn't pinch to zoom in on the photo inside the Story editor.
Frequently asked questions
Do stickers, music and filters make Stories blurry?
They don't blur your photo on their own. Adding music to a photo does turn the Story into a video, though, and video goes through heavier compression than a still image. If a photo Story with music looks soft, try posting the same photo without music to compare.
Why do my video Stories look worse than my photo Stories?
Video carries far more data than a photo, so Instagram compresses it harder. Fast motion, low light and fine detail suffer most. Shoot in good light, keep the camera steady, and export at 1080 x 1920 with H.264 at 30 FPS.
Is it better to record inside Instagram or with my phone's camera?
Usually your phone's own camera app. It gives you more control over focus, exposure and resolution, and on some phones Instagram's built-in camera records at lower quality. Record with the native camera, then upload from your camera roll.
Why does one Story slide look blurry when the next looks fine?
Each slide is a separate upload. If one came from a screenshot, a chat app or a different-sized file, or uploaded while your signal dropped, it will look worse than the others. Delete that slide and re-upload the original file.
Do Stories look blurry for viewers on slow connections?
They can. Instagram may show a lower-quality version to someone on a weak connection or with data saving turned on. If a Story looks sharp on your Wi-Fi but a friend says it's blurry, their connection may be the reason.
Does Instagram support 4K Stories?
You can upload a 4K file, but Instagram resizes it for display. Exporting at 1080 x 1920 yourself gives you control over that resize and uploads faster.
Fix the file, fix the settings, and use a strong connection, and your Stories should look the way they did in your camera roll. When you want to plan and schedule them ahead of time, Start free — no credit card required.